Steps to Access Ring Camera Setup Page
Introduction to Ring Camera Setup
Ring cameras are designed to make home security simple, but the setup process can feel confusing if you’re doing it for the first time. Whether you’re installing a Ring indoor camera, an outdoor wireless model, or a Ring doorbell camera, proper setup is essential to ensure smooth performance, reliable alerts, and uninterrupted video streaming.
This guide walks you through every method of Ring camera setup, from using the Ring app to manual configuration, WiFi changes, wired installations, and troubleshooting common issues. No guesswork-just step-by-step clarity.
How To Setup A Ring Camera
The standard Ring camera setup process takes only a few minutes when everything goes right. You’ll need a stable WiFi connection, the Ring app, and your camera powered on.
Basic steps include:
- Download the Ring app on your smartphone.
- Create or log in to your Ring account.
- Put the Ring camera into setup mode.
- Connect the device to your WiFi network.
- Complete in-app instructions.
Need to Ring Camera Outdoor Wireless Setup
Ring outdoor wireless cameras are designed to handle changing weather conditions while keeping an eye on outdoor areas like entrances, garages, driveways, patios, and backyards. However, because these cameras rely entirely on WiFi and battery power, correct placement and preparation are critical during Ring Camera setup.
For a smooth Ring Camera outdoor wireless setup, always choose a location that is well within your WiFi router’s coverage area. Thick exterior walls, brick surfaces, metal siding, and large trees can weaken the signal and cause live view delays or missed alerts. Before mounting the camera permanently, it’s a good idea to test the signal strength using the Ring app.
Battery-powered outdoor cameras should be fully charged before installation to avoid interruptions during Ring camera wifi setup. Once installed, test motion detection, night vision, and live streaming to ensure the camera performs reliably in real-world conditions. A strong and stable network connection is the backbone of outdoor Ring camera performance.
Complete Guide to Ring Camera Setup
Ring cameras offer multiple setup methods to accommodate different home layouts, network environments, and device models, including the Ring floodlight camera setup. Whether you’re using a battery-powered camera, a wired model, or an advanced system connected to a chime or base station, Ring provides flexible setup options.
You can use the Ring Camera app setup method or also manually connect the device when pairing fails. Alternatively, you can use Ethernet for temporary or stable connectivity or integrate the camera with an existing Ring ecosystem. Choosing the right setup method depends on your camera type, WiFi strength, and installation location. This guide ensures you understand every option so you can select the most reliable approach for your situation.
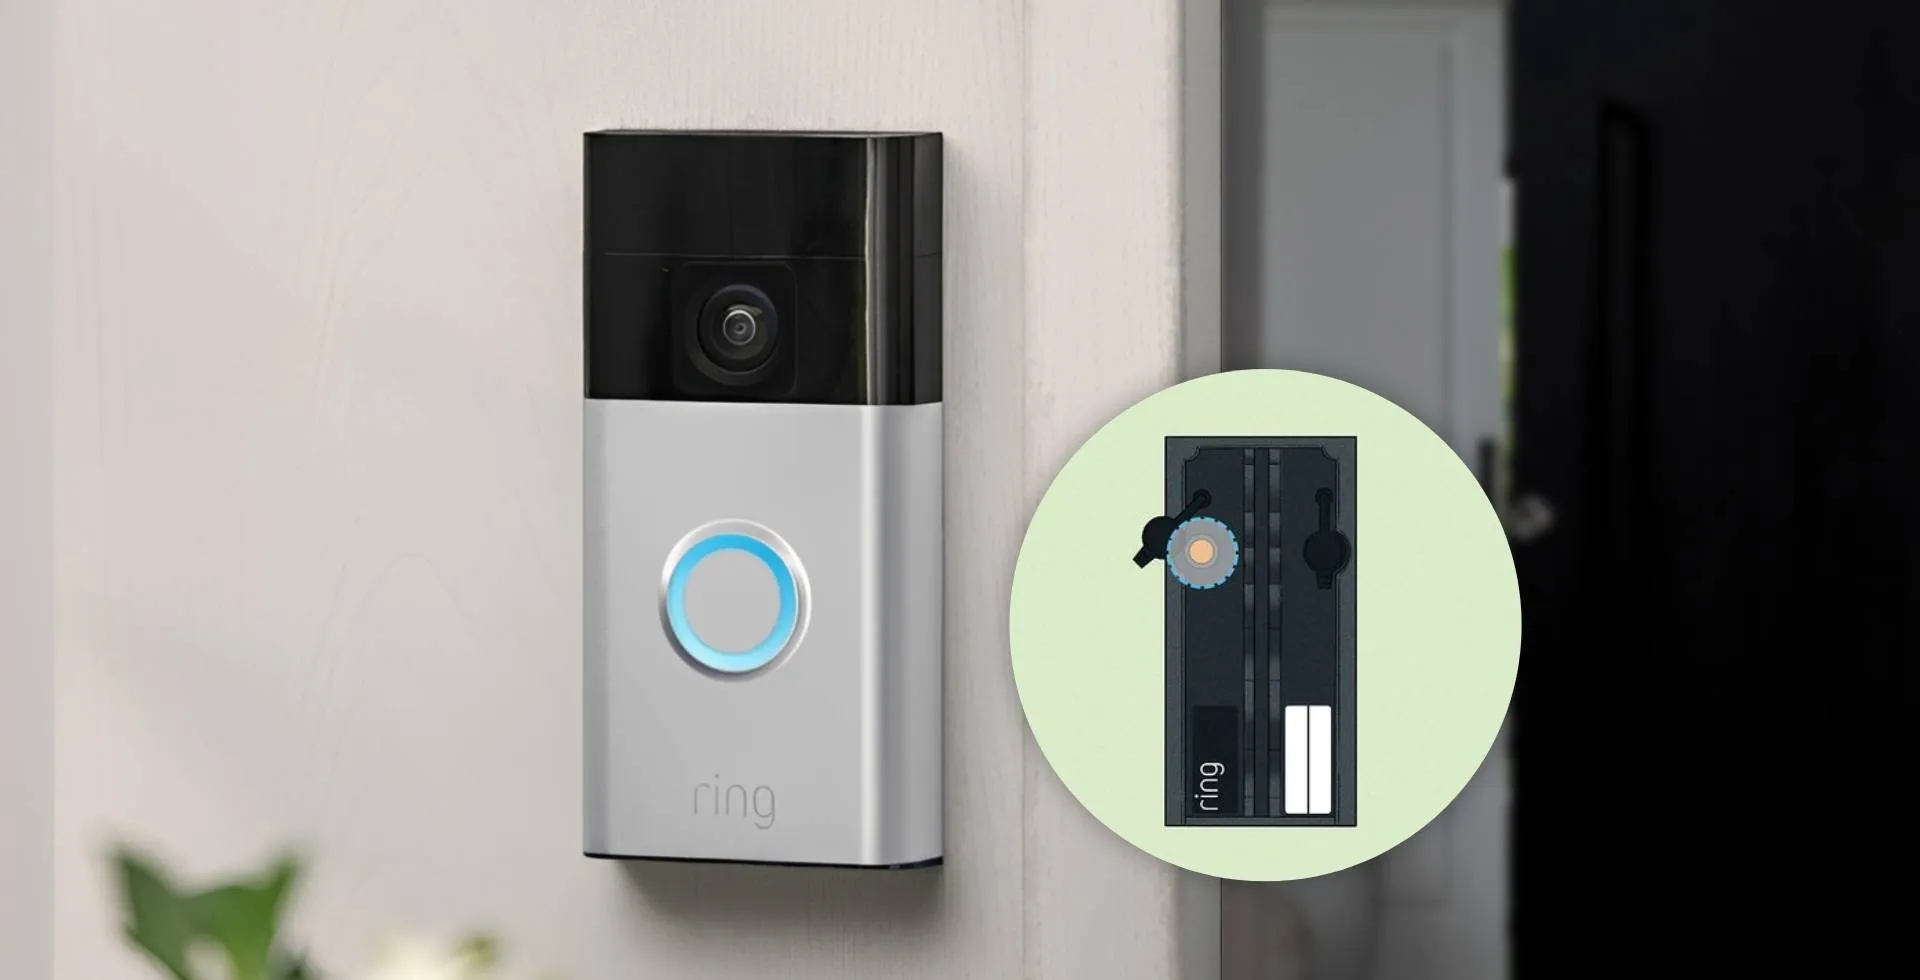
How To Setup Ring Camera Manually
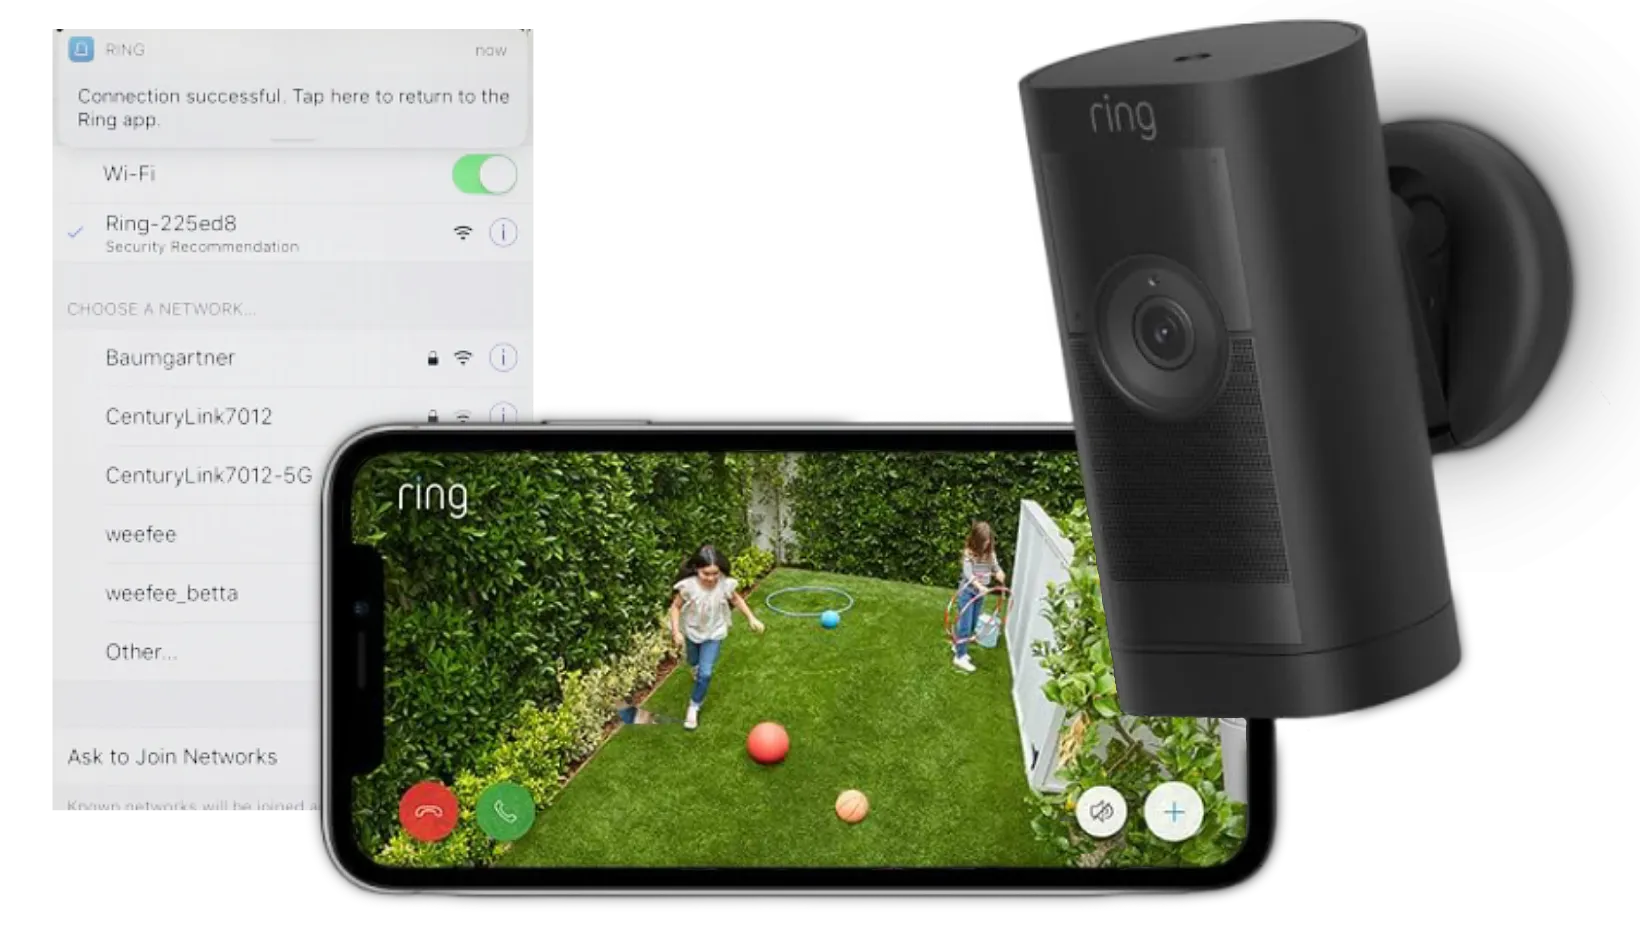
Manual ring security camera setup is most useful when the Ring app cannot automatically detect the device or when QR code scanning fails. This process allows you to establish a direct connection between your phone and the camera.
The process begins when you reset the camera and place it into setup mode manually using the setup button. Once activated, the camera broadcasts its own temporary WiFi network, which you can connect to from your phone. After establishing this connection, you return to the Ring app to access the Ring camera login page and complete the configuration, including WiFi selection and device naming.
Manual setup is particularly effective for resolving pairing issues, switching networks, or recovering a camera after a failed setup attempt.
Ring Camera Setup via Ring App
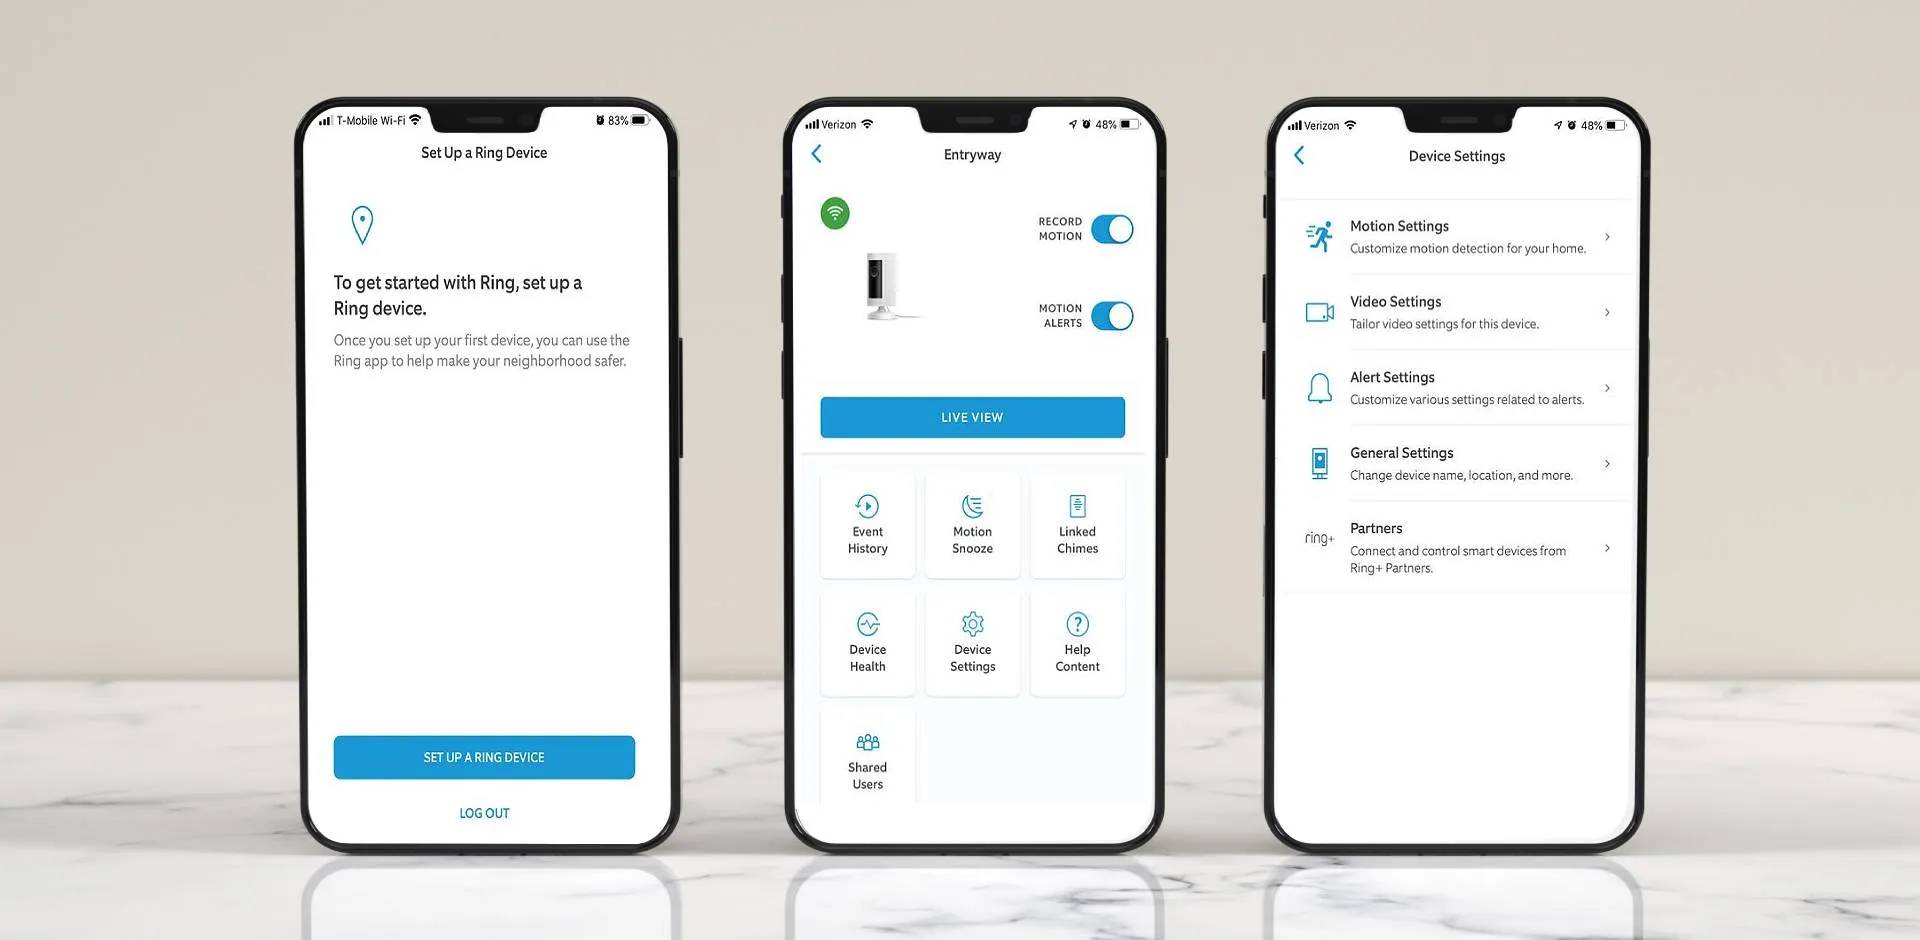
Ring camera app setup is the fastest and most reliable way to set up any Ring camera. It provides guided instructions, automatic detection, and built-in troubleshooting support throughout the process.
Using the app, you scan the QR code on the camera or packaging, assign the device to a specific location, and connect it to your WiFi network. The app also lets you customize motion sensitivity, notification alerts, and camera privacy zones. Firmware updates are handled automatically, ensuring your device stays secure and up to date.
This setup method supports all Ring camera models, including the Ring doorbell camera, and more, and is recommended for first-time users. If you are looking to update firmware, it can be done conveniently using the app as well.
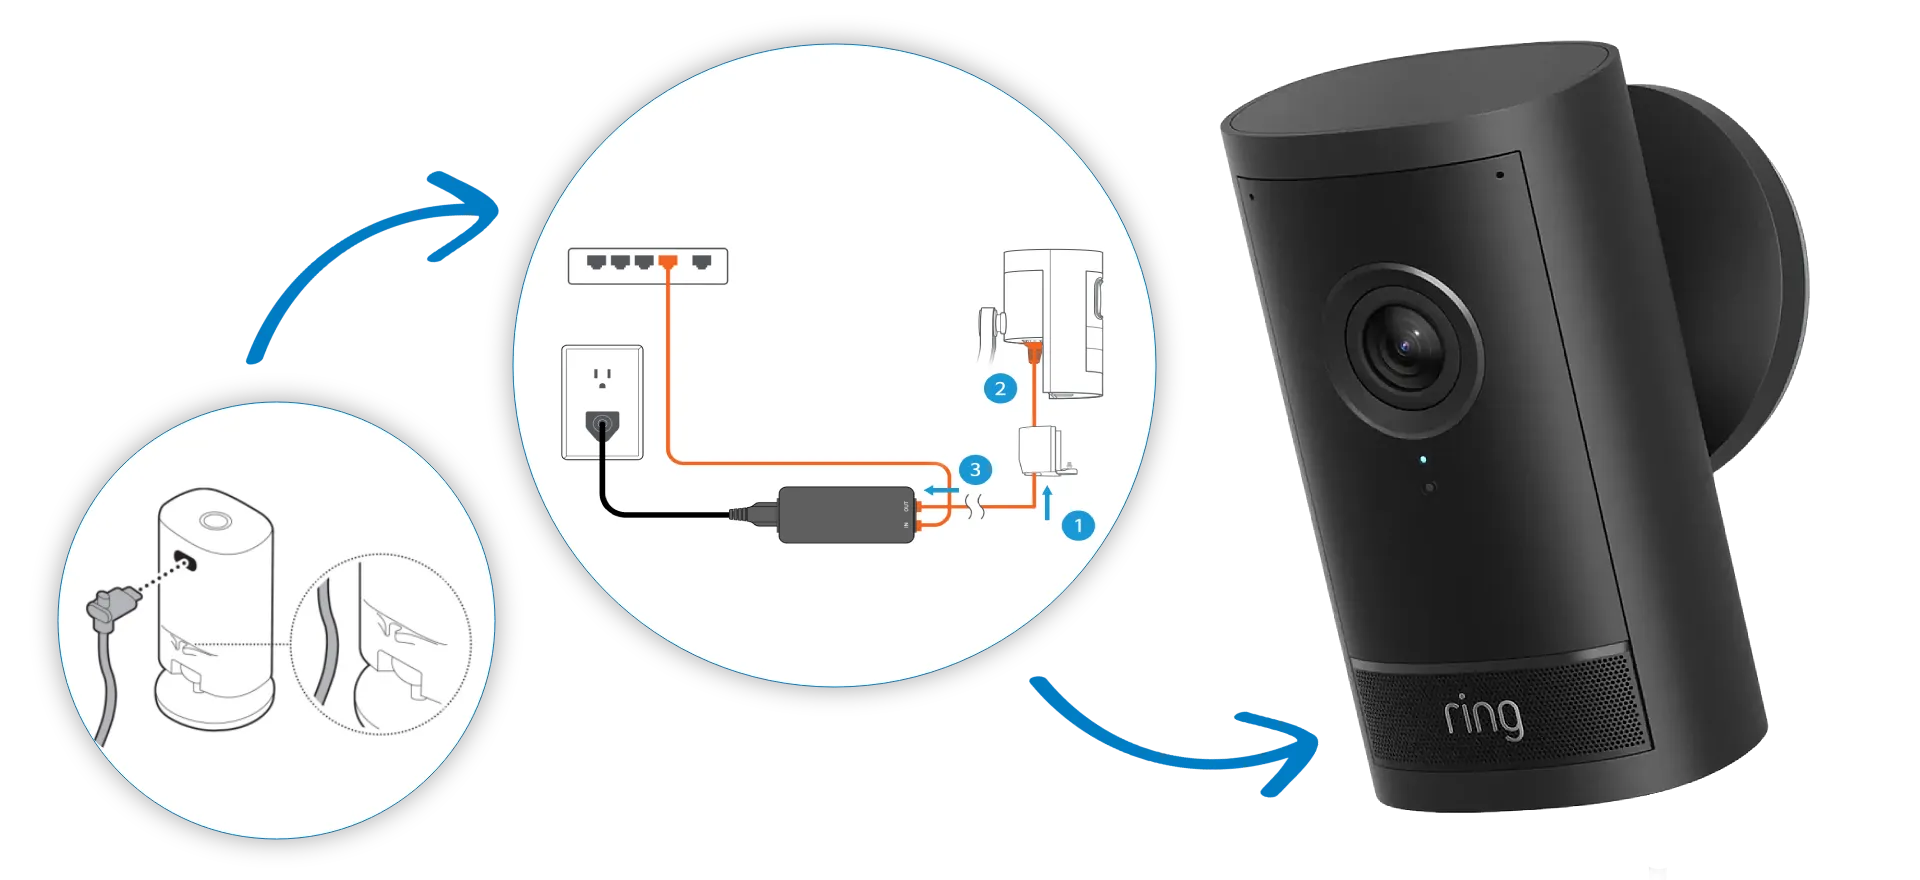
Ring Camera WiFi Setup Using Ethernet
Some Ring cameras allow Ethernet setup using a compatible adapter. This can be very helpful in areas with weak or unstable WiFi signals. This method provides a direct network connection during Ring camera wifi setup, reducing the risk of connection failures.
Ring Doorbell setup using Ethernet is ideal if your wireless network struggles to reach outdoor areas, if you’re installing the camera temporarily, or if wireless pairing repeatedly fails. Once setup is complete, many users switch back to WiFi for daily use while keeping Ethernet as a backup option.
Setup Ring Camera Using Existing Chime / Base
If you already have a Ring Chime or base station, you can integrate your new camera into the existing system. This arrangement improves reliability when it comes to notifications and allows devices to work together seamlessly.
- Start by powering on the chime or base and confirming it’s connected to WiFi.
- Then add the camera through the Ring app and link it to the existing device.
- Once paired, alerts and notifications become more consistent across your Ring network, especially in larger homes.
How to Setup a Ring Camera Without the QR Code
If the QR code on your Ring camera is damaged, missing, or unreadable, you can still complete setup without any issues. The Ring app includes a manual setup option that bypasses QR scanning entirely.
Simply select “Set up without QR code”, enter the device’s serial number, and follow the guided instructions. This method works for both indoor and outdoor Ring cameras and is especially helpful for older devices or second-hand units.
How to Setup Ring Camera With New WiFi
When you change your internet provider, router, or WiFi password, your Ring camera must be reconnected to the new network. Fortunately, this process does not require a full reset.
Using the Ring app, select your camera, choose Change WiFi Network, and enter the new credentials. The camera will reconnect while preserving its existing settings, motion zones, and alert preferences. This method is faster and safer than resetting the device entirely.
Wired Ring Camera Setup
- Before installation, confirm that your wiring meets Ring’s voltage requirements.
- Always turn off power at the breaker before handling wires.
- Once connected and powered on, place the camera into setup mode and complete configuration through the Ring app.
How to Create Account for Ring Camera
- Open the Ring app or visit the official website.
- Enter your email address and password, and verify your email.
- Once logged in, you can add multiple Ring cameras, assign locations, and manage settings from one dashboard.
Ring Indoor Camera Setup
- After plugging in the camera, launch the Ring app
- Follow the guided instructions to connect it to WiFi.
- You can customize privacy zones, motion detection sensitivity, and notification preferences to suit your indoor environment.
Ring Doorbell Camera Setup
Ring doorbell cameras are available in both battery-powered and wired versions, offering flexibility for different entryway setups.
- Installation can be done by mounting the device near your door at the recommended height.
- Connect the device to the power source and add it to the Ring account.
- Once added, connect it to the WiFi network at your home and the chime.
- This will connect the devices, and you can proceed with testing if that works.
- Once done, complete the Ring security camera setup through the Ring app by testing motion detection, two-way audio, and alerts.
Troubleshoot Ring Camera Setup Issues
Ring App Not Finding the Device During the Ring Setup
Ring Camera Won't Go into Setup Mode
Ring Camera Not Connecting to WiFi During Setup
Connection failures during Ring camera wifi setup are often caused by incompatible WiFi settings or weak signals. Most Ring cameras require a 2.4GHz network, as 5GHz networks are not supported on many models. Make sure your phone and camera are connected to the same network and positioned close to the router. Restarting your modem and router can also clear temporary network issues that block successful pairing.
Incorrect Wi-Fi Password Error
An incorrect WiFi password error usually appears due to typing mistakes or unsupported characters. Carefully re-enter the password, checking for capitalization, spaces, or special characters. If the ring camera setup issue persists, consider temporarily changing your WiFi password to a simpler one during setup. Once the camera is connected successfully, you can update the password again if needed.
Weak Signal or Offline Ring Camera
Ring QR Code Not Scanning
Update Ring camera firmware
Ring Camera Re-Setup after Resetting
After resetting a Ring camera, the device is removed from its previous configuration and must be set up again as if it were new. Open the Ring app and select Add Device, then follow the on-screen instructions to reconnect the camera to your WiFi network. You’ll need to place the camera into setup mode, scan the QR code (or use manual setup), and assign a location and device name.
Once the re-setup process is complete, review and reconfigure important settings such as motion detection zones, alert sensitivity, notification preferences, and privacy controls. Any custom settings from before the reset Ring camera will need to be applied again. Resetting a Ring camera should be considered a last-resort solution, typically used when persistent setup or connectivity issues cannot be resolved through standard troubleshooting steps.